Showing posts with label gifts. Show all posts

Saturday, February 4, 2012

Pocket Tissue Holder

I was trying to think of fun crafts to how my daughters on Valentine's Day that don't include candy and came up with this cute idea. Can't claim totally originality as I have seen them before on other site.

I took my candy cane Christmas fabric and cut out two rectangles. I turned right sides together and stitches the edges leaving an opening on the short side to turn the fabric inside out. Once it is flipped fold in the raw edges and run a stitch along each short end.

If you want to embellish the case do so now. I tore a skinny strip of the fabric and stitched down the center then pulled one thread to gather it into a ruffle. I pinned the ruffled on then sewed it near the bottom third. You could run a ribbon, button, or bow now if you would like. Another fun embellishment would be a piece of trim cut from the Tasteful Trim Big Shot XL die.

Next center the tissue packet and overlap the center seams ever so slightly. Pin the short ends. Run a seam across the ends and back stitch over the center overlap to anchor firmly. Flip inside out and insert your tissue packet.

Thursday, December 30, 2010

Creative Sketches Week 5 Project


am so excited!  I got accepted on a design team for Creative Sketches.  So today I am posting my first project as a member of a Design team.  How fun!

Our project this week was anything goes, so I made a simple diaper fold pouch for some Christmas treats. To make a Diaper Fold Pouch you need a square piece of paper, folded in half like a triangle, then the joined sides fold in to touch the opposite edge.  Fold the top flap over and hold with a piece of adhesive then decorate.  You can size this up or down as needed.  My piece here was 7" and fits 2 Chocolate squares. A 6" piece will hold 1 treat very nicely.

I love being able to coordinate paper, stamps, and ink!  Thank you Stampin Up!  I love my A Cute Christmas stamp Set with Candy Cane DSP.  I am going to miss these guys! 

Pop over to the blog and post your project and link!

Sunday, December 12, 2010

Designer Fabric Apron- Free Pattern Included

My upline group had our Christmas party yesterday, and we had a Yankee Exchange Christmas Swap. The criteria for the exchange was to make a homemade or handstamped item that would be valued at $20 at a craft fair.


I decided to make an apron using my Designer Series Deck the Fall Fabric. (#121716) It took the better part of the entire package, but I still have some scraps left over for ornaments and fun coasters.


I have included my simple pattern for the apron. It should be pretty simple to follow, but email me with questions. Next time I think I will include a pocket on my apron. You could also make a fuller ruffle if you want to add an extra strip. There would be enough fabric to do that.

Also, you could include some contrasting trim using the Bigz XL Die Tasteful Trim (#120893) or fun flowers using Bigz Flower Folds Die #115970.


You need 1 package of Stampin' Up! Designer Fabric

1st panel  Stampin' Up! Fat Quarter 28x18”
Cut 2nd panel at 4”, 8” and 12” to create the waistband.
Cut 3rd panel at 2“ and 4” to create seam binding for the sides.
Cut at 8” and12” to create the ruffle. If you want a fuller ruffle, cut a third panel for your ruffle.


Sewing Instructions:

Press all the panels flat before you cut. Cut pieces and get ready to sew. You will need thread, lots of pins and your iron handy as you work.  Press all seams after you finish them for a more finished looking piece. I like to zigzag all my finished seams to give a more finished look when I sew, but that is up to you.  I used a 3/8" seam allowance throughout the project.

Sew the ends on the ruffle together. Pres seam flat. Zigzag the bottom edge of the strip ruffle, and fold 1/2” over the edge making a hem and sew 3/8” from the edge. Press flat.

Sew the top edge of the ruffle with a loose running stitch to gather the fabric. Pull in gathers and adjust to fit.  Pin to the main apron panel and sew the ruffle to the apron.

Sew the waistband strips together on end and press in half. Turn wrong sides together, sew and then turn inside out (This is the trickiest step since the strip is about 2 yards long.)  and press.

To make binding, fold the strips in half, then fold the raw edges in to the center and press flat. Fold the entire strip together and press the binding flat. Pin those strips to the panel edges, and sew to the main panel.

Pin the finished waistband to the top of the apron, and sew to the center panel. Turn the waistband ends inside, and sew. Press all the seams and trim loose thread.

Thursday, December 9, 2010

Christmas cookies and Free recipe!


My neighborhood had a cookie swap and had prizes for taste and presentation. So I had to throw my hat in the ring. I used my all time favorite Cowboy Cookie recipe and created a recipe card in My Digital Studio. I used my A Cute Christmas download stamp set in MDS so that I could also use my matching Candy Cane Christmas fabric, (#121715) cardstock, and Candy Cane Buttons (#121718) to make the recipe card and bag work together.


I bought a white ceramic plate from the dollar store and dressed it up with a coordinating decor elements rub on.(Candy Cane Christmas #120912) I can make about 15 different things with that set and they all make great gifts!!


Since I wanted the cookies to stay on the plate I had to use a cookie bag to hold everything. I found a simple red and white candy one, but I would have preferred a clear one.


If you would like the recipe, comment below and I will email the cookie card.
I didn't win, but I'll try again next year!

Sunday, November 21, 2010

$200 raffle basket


I had a great afternoon with 4 other ladies doing a multi vendor holiday open house. We had a good turnout, and if you missed a chance to get in on the incredible basket with $200 worth of goodies from Stampin Up!, Lia Sophia, BeautiControl, Thirty-one, and PartyLite, there is still time to earn raffle tickets.

Until next Friday, if you book a workshop with me or place an order with me, you will earn Raffle Tickets for the large basket. Booking workshops earns 5 tickets, and every $10 spent earns 1 ticket. Orders can be placed online, emailed or called in to me to earn tickets.
Every $50 order placed with me earns a free framed art project in additional to the
Raffle tickets.


I also was holding an added incentive tree and will allow you to choose an envelope from my booking tree as well. The tree held items from $3-$10. You would receive them with your workshop order.

Please contact me with any questions, or to place orders. If you would like to order Christmas cards, contact me as well.

Wednesday, September 29, 2010

Teacher gift idea


I got a free package of play date quick accents at convention and finally pulled them out to work on a variety of teacher gifts using those.

I got a metal tin at the craft store and went to work. Sticky strip is your friend here, but tombo mono works well too. I colored and stamped with forest friends owl. I added a few strips of the quick accents and used my scallop border punch as well to make the cardstock a little more exciting.

Sunday, September 26, 2010

Altered Pumpkins


I talked about these yesterday but never actually posted their picture. I started off my Halloween decor mission with 3 foam pumpkins, a package of decor elements, and a package of black suck on rhinestones.

I cut apart my phrase and sections of my Jewels and then transferred them to my pumpkins. The jewels have a sticky sheet you use to Transfer which makes it really easy!! I might still add some black lace, but I'm not sure yet.

Saturday, September 25, 2010

Spooky Decor Elements serving ware


I don't have any Halloween dishes really, but I bought the sheet of decor elements to make my Halloween pumpkins, and then I had lots of pieces left over.

I went to walmart and bought 3 inexpensive white porcelain dishes and applied my Decor elements on them. I just tested them out at my Open House and they have done quite well at holding food and being washed and tried. I am not going to try the dishwasher, but they do well by hand! Yeah!

I could even make place cards and invitations with the coordinating stamp set!


Friday, September 24, 2010

Open house Treat Sneak Peak


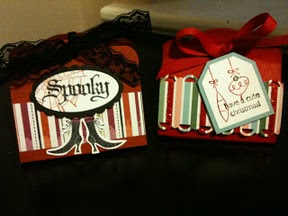
I wanted to share these two cute little Treat holders I created for my open house. These are great for any occasions, but i made halloween and christmas treat holders.

All you need is a stamp set for any occasion, and the tags die for the big shot. (cut paper to 4.5x3) It is a simple but adorable candy holder that goes together very quickly! Choose any embellishments you want. Mini glue dots work well to adhere the candy to the treat.

Monday, September 20, 2010

More frankie ideas


This time I made a treat holder with a baby Frankie which holds a Ghiridelli chocolate square.


I used my new label punch from the Holiday Mini Catalog, and my small 1/2" circle punch and used the same basic pattern from my large Frankie. This time I added a shirt for Frankie. Cut the edges off with the corner punch. Stamp the saying in the center and emboss with black embossing powder.

You need a 3x8.5" piece scored at 3", 3.25", 6.25" and 6.5". You can get 3 treat holders from one piece if paper.

Fold the holder so the short piece ends up on the inside flap. This will get punched with the word window punch and then glued down to hold the chocolate inside. A piece of ribbon tied around will keep it all together.

I stamped bats on the top half from the wicked cool set, and used the wicked
Fun ds paper.

Saturday, September 11, 2010

Frankienstein Treat Holder


I have a favorite painted scroll saw wood cut artist, and I have done many of her pieces, thank you Gayle Shoell! But I needed to make some treat swaps. So I used my trusty Top Note die and made this bad boy.

Tips- I stapled the candy treat bag to the back piece of his head before putting down the hair and I used the treat bag upside down so the candy can come out without ruining Frankie.

I used my circle punches, word window punch, heart trio, and the Big Shot Top Note Die.  I also used sponges, and white gel pen.  You can't see it but inside I filled a small treat bag with 5 nuggets that I wrapped with stamped avery labels.  They look so cute, and it was easier than cutting and glueing on some dsp.


Tuesday, July 13, 2010

Matchbox Drawer


This cute little project is simply made using our Big Shot matchbox XL die, 2 Sizzlits dies to make the buttons, Baja Breeze, Chocolate Chip, and some of the new In Color Pear Pizzaz cardstock, and Greenhouse Gala Designer Series paper, an adorable stamp set out of the New Idea Book and Catalog, and of course, DSP wrapped Chocolate for an extra touch!  To make this adorable drawer unit for yourself, please email me to come to my next workshop. I provide the materials and fun needed for a craft night with friends.

During July, I am having special hostess only gifts and incentives.  Please contact me for more information of earning free stamps and other goodies! To order a Drawer Unit Kit, please email me for pricing information.

Wednesday, May 19, 2010

Grad Gift Card


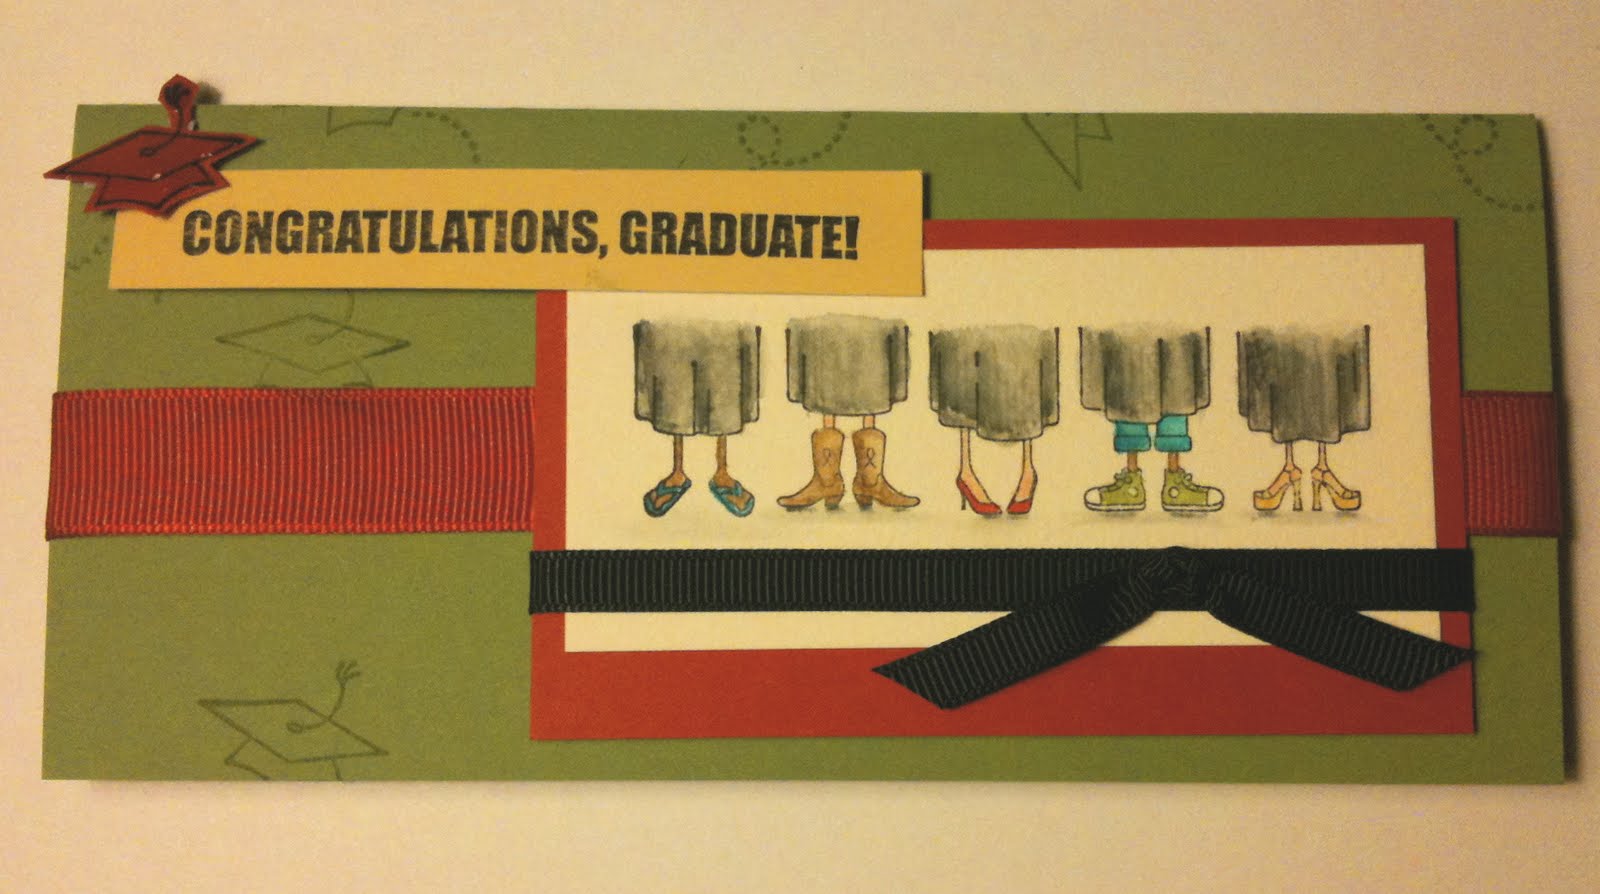
I started worked on a stash of Graduate gift cards for my graduating nieces and nephews this year. I was excited to see the Go Graduate Stamp Set in the Summer Mini Catalog! I wanted to make something that could work well for cash or a check since I never know what they will really need for a graduation gift and like sending something mailable in an envelope!

I used my ink pads as watercolor palettes and a brush to paint in the feet stamp. It took a little time since you need to make sure each touching section is dry before you paint with it or the colors will run into one another. Doing gowns, then shoes, then legs works well for that purpose.

I used the layout challenge from the Stampin 411 Blog and the watercolor technique from the Just Add Ink Blog Hop. I really like the tutorial for watercolors for Just Add Ink. I went to art school and majored in illustration, but never really thought about using some of my watercolor skills directly in stamping. It was absolutely the right technique for this stamp set! This was a great reminder about how much fun that can be, as well a fantastic set of instructions for anyone who has never attempted watercolors. The watercolor paper by SU is great, but Stazon is a must for this!

Tuesday, March 23, 2010

Easter Basket


I went to an Demonstrator support meeting last night and one of the ladies brought a wonderful basket to demo for the Round Robin. I thought it was just darling, so I went home right away and made on of my own! I also stamped 4 little cards to go inside the basket. Pair this with a few little candies and you will have a wonderful gift for a friend.

To make your own Basket, you need;

A Stamp Set-I used Vintage Vogue and Teeny Tiny Wishes and the Very Vintage Jumbo Wheel
The Big Shot Scallop Envelope Die
Shades of Spring, or other DS paper
2 brads for the handles
4- 3x3 envelopes
A Flower from the Pretties kit-I punched out a center from DS paper using my 1" punch.
various shades of cardstock to match your DS paper-I used So Saffron, Certainly Celery, and Pretty in Pink.
and a few other embellishments, ribbons, and adhesives.

Click on the shopping link on the side to visit my demonstrator website and buy the materials to make a basket of your own, or you can order a kit from me for $10 for a Gift Basket Kit. All materials will be cut and ready for you to stamp and assemble. You will have enough materials to assemble 1 basket and 4 cards as well as a pdf tutorial file to make your basket.
Related Posts with Thumbnails