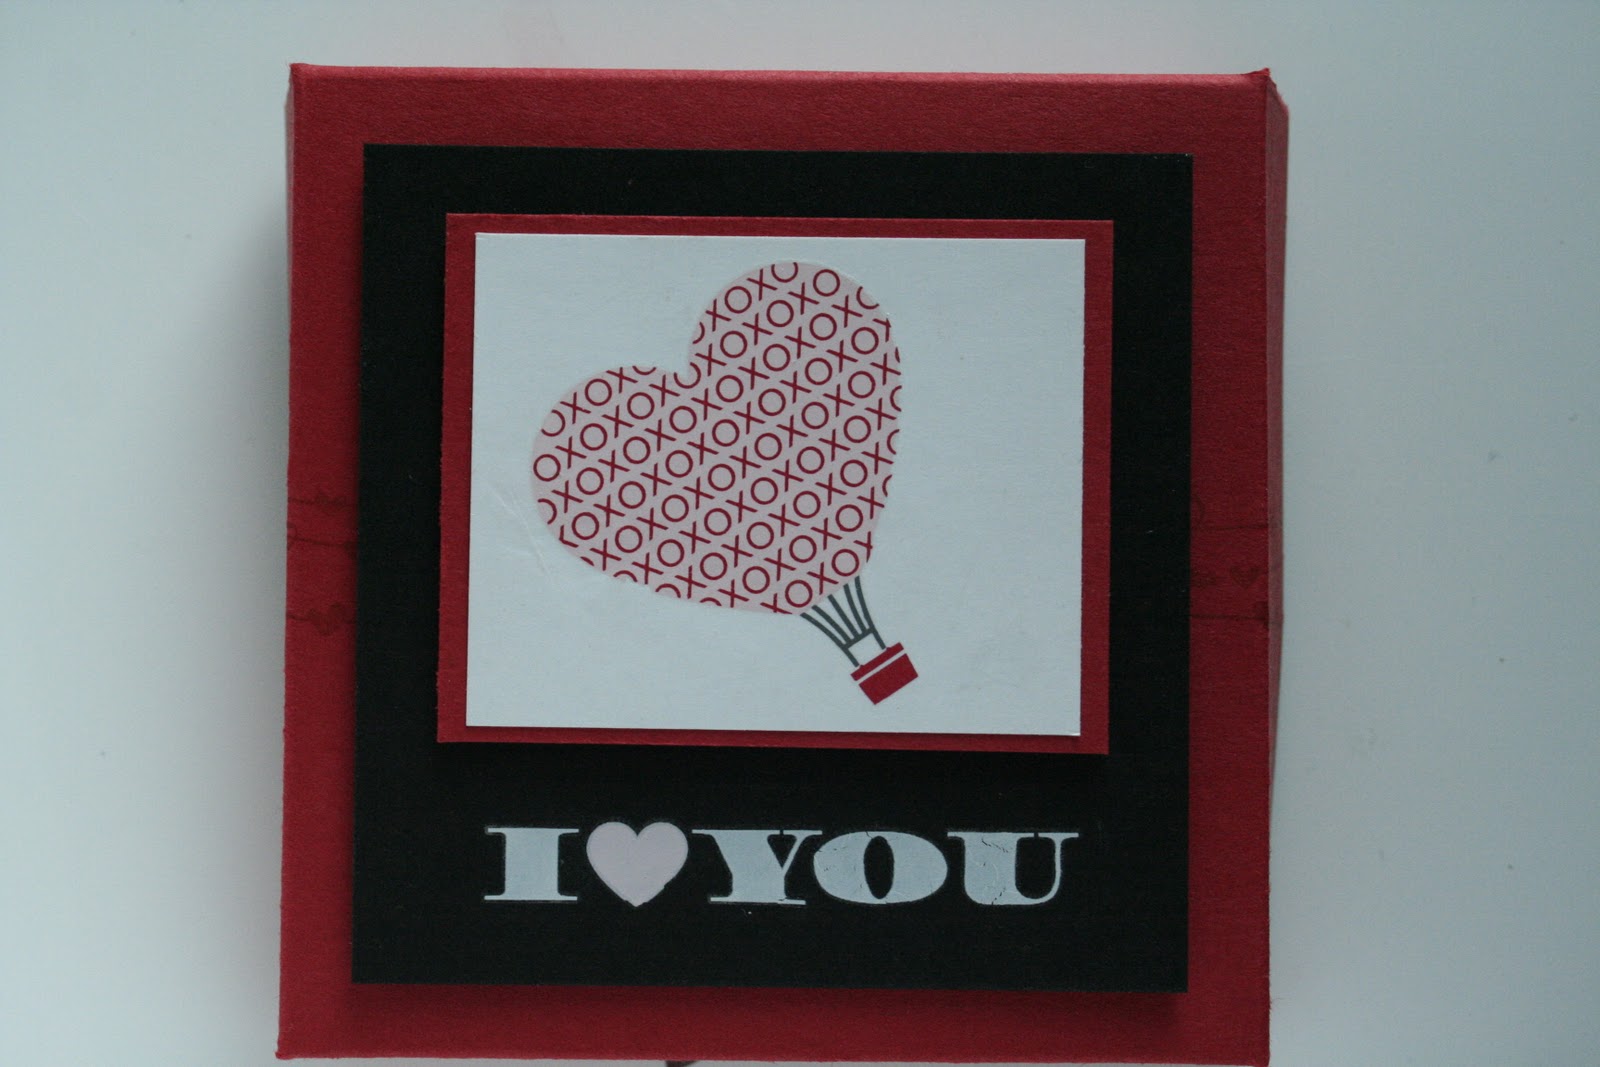
I made this one without using my fun little stamp set, and I'm still working on the other version, but I am so proud of this one. It is a gift for a good friend and while I wish it was done for the first, it's better than never at all!!
I used retired supplies from my stash, and it was nice to use existing supers. Along the way I picked up speed and I think the next one will go so much faster!!!
I painted the chipboard and sealed the painted frame. I used 2-3 coats of sealer. I also used a few coats of mod podge for my center piece of scrapbook paper. Then I wrapped every cube. Use plenty of glue stick and perfectly trimmed strips of paper to make this job fast and easy, if sticky!! It worked better than the sticky strip and I think it is more secure this way. I also trimmed each curved notch by hand but a 3/4" punch would work I think, I ordered one as I don't own it!! Gasp!!
The final step was adding glitter to my chipboard numbers, this was super messy. Tombow green glue worked really well for the chunky glass glitter and I liked my two way glue for the
Micro glitter. I love the extra bling the glitter gives! After the numbers dried I used Tombow again to get all the numbers in place. It ships off today. It was a labor of love but so worth it!!
Showing posts with label gift. Show all posts
Friday, December 9, 2011
Saturday, November 19, 2011
Craft fair
Today I did a vendor fair at a community fundraiser. I had a great time and was glad to help support a really neat individual.
I made range of items including; reindeer food, bookmarks, notepad holders, post-it pads with pens, and several other items. It was fun making everything this past week, and now I have some great experience! I also was able to use many scraps from my stash of retired paper and embellishments. I'll have to go back and link to all the great websites I used for inspiration! Thank you to all you creative folks out there with wonderful ideas!!!


I made range of items including; reindeer food, bookmarks, notepad holders, post-it pads with pens, and several other items. It was fun making everything this past week, and now I have some great experience! I also was able to use many scraps from my stash of retired paper and embellishments. I'll have to go back and link to all the great websites I used for inspiration! Thank you to all you creative folks out there with wonderful ideas!!!


Monday, October 24, 2011
No sew pin cushion and Sewn version
I found this awesome pair on this blog, and had to CASE it! Thank you for the inspiration!

Sewn version first-
I adore my Big Shot for fabric projects. I used my square scallop die to cut out 8 squares from my Spice Cake fabric.
See together with right side out so you have the scalloped edge. Repeat 4 times and then sew the top and bottom block. Now you have a front with 4 squares and a back. Press with an iron. Go around the edges leaving a hole out for stuffing. Stitch the open edge closed.
Take two buttons and a large needle. Go from side to side pulling the buttons in to create a divet. Snip thread all over and you are done!

No sew version-
Cut a 8" square of fabric and grab a handful of fluff. I used a fancy feast cat food can, but a different small container would work for this project as well. Think small flower pot or metal can.
I cut a 1.25" x 12 strip and wrapped my can. I heated hot glue, and ran a bead of glue around the top of the can. Wrap the fabric and fluff in a ball, and pit inside the cat food can without burning yourself! Tie a bow or embellishment and you are done!


Sewn version first-
I adore my Big Shot for fabric projects. I used my square scallop die to cut out 8 squares from my Spice Cake fabric.
See together with right side out so you have the scalloped edge. Repeat 4 times and then sew the top and bottom block. Now you have a front with 4 squares and a back. Press with an iron. Go around the edges leaving a hole out for stuffing. Stitch the open edge closed.
Take two buttons and a large needle. Go from side to side pulling the buttons in to create a divet. Snip thread all over and you are done!

No sew version-
Cut a 8" square of fabric and grab a handful of fluff. I used a fancy feast cat food can, but a different small container would work for this project as well. Think small flower pot or metal can.
I cut a 1.25" x 12 strip and wrapped my can. I heated hot glue, and ran a bead of glue around the top of the can. Wrap the fabric and fluff in a ball, and pit inside the cat food can without burning yourself! Tie a bow or embellishment and you are done!

Labels:
3D Project,
Big Shot,
buttons,
gift,
Holiday,
Holiday Mini Catalog
Friday, October 21, 2011
Advent Calendar project in the works
I have been searching for the perfect advent calendar for years ever since we had children. This year, I will have one that I will be able to use for years to come! Stampin' Up! thoughtfully created a great new advent stamp set that I am going to use to make an incredible calendar for this year. I will also be using the new coordinating Big Shot die and 1" Square punch. I debated doing it on paper or in a frame like the awesome one I saw at Stampin Up! Convention, but I think I like this new idea better. I will be using a 25 small boxes around a frame so I can put little treasures inside for my children to take out each day!
I will stamp, punch and color, and then decoupage all the boxes, and create a wonderful punch art for inside the advent frame! Winter Wonderland, snowmen, and glitter here I come. No finished pictures yet since I finally found a supplier online for the box frame, and they have been shipped out Wednesday. Normally I try and use only Stampin' Up Products, but I needed something that we didn't have-gasp!.
Check back next week to see what I have created! This is a great holiday gift which I will be selling only 2 of at a local benefit in November. If you want to order the materials or a complete kit, please contact me!
I will stamp, punch and color, and then decoupage all the boxes, and create a wonderful punch art for inside the advent frame! Winter Wonderland, snowmen, and glitter here I come. No finished pictures yet since I finally found a supplier online for the box frame, and they have been shipped out Wednesday. Normally I try and use only Stampin' Up Products, but I needed something that we didn't have-gasp!.
Check back next week to see what I have created! This is a great holiday gift which I will be selling only 2 of at a local benefit in November. If you want to order the materials or a complete kit, please contact me!
Labels:
Big Shot,
gift,
Holiday,
Holiday Mini Catalog,
Punch
Thursday, March 3, 2011
Video Tutorials Coming Soon
I just got a camera and tripod to starting posting some video tutorials on my blog and on You Tube. I'd like to get a feel for the sort of tutorials that would be most beneficial. For the comment that I decide to start off with, I will send them a special handstamped gift.
So post your comments below, and stay tuned and see who wins the gift! Thanks!!
Labels:
Blog Candy,
gift,
tutorial
Thursday, February 17, 2011
Valentines MDS Style
I have two school age girls, and both girls are in Girl Scouts, which meant we were looking at over 70 valentines that needed to be made. Shockingly enough I left it until the last minute. My Digital Studio was able to help me out! I created a 6x6 card, then shrunk everything down and placed 12 on a page. I mounted those 2.625" squares on a 3x3 piece of cardstock, which got adhered to candy and a pencil. The concept was lollipop, but it became more of a flag:) I'll choose different candy next time. I also used some leftover candy cane fabric to make an adorable little flower from my Island floral Die. Not only did it make a great accessory for the bag, it is actually a hair clip for her teacher. My daughter said she wore it the rest of the day! Yeah!
Labels:
Big Shot,
fabric,
gift,
Holiday,
occasions Mini Catalog
Saturday, January 22, 2011
3x3 Pizza Box - Free Template
This adorable little box is made from a half sheet of cardstock, scored, folded, decorated, assembled, then finally glued! I used Valentine defined again from the Occasion Mini Catalog. This little box will be part of my Love Sweet Love Class, which will be available as an online class/kit for purchase. I will send you all the supplies and instructions to make the 2 cards and the pizza box for $8 (Includes shipping). I'll have a list of additional supplies which can be purchased though my website. (stamps et, blocks, ink, etc)
I do love my heart punches, and had to bring back the coordinating stamp from my Love you Much set. My next project is going to dust of the entire set and bring back my favorite little mouse, but in the mean time, it fits perfectly in my punch!
I still say when in doubt, labels make the best Nugget wrappers. Designer Series paper is always adorable, but in a hurry, stamp and wrap! I made a simple divider to keep the chocolate in place, but when you are done, the box can be reused to hold your 3x3 note cards.
I have included the template to make this little guy, but you can also watch an awesome video by fellow Demonstrator Mike Funke, and he also has a handy mathematical formula for figuring out how to make the box at any size. (On a side note, I met him last year at Convention -. Really great guy, and always fun to meet a guy demonstrator!)
I made a second box last night using a set of Free Rub Ons that Stampin Up gave all the demonstrators. With that box I included a set of 3 note cards.
I love the Red tree with the Crystal Effect Hearts. I think it really makes the card pop!
If you would like to order a box & set of cards for yourself, it is also $8 plus shipping.
This template has instruction for a 3x3 box. Check out Mike's blog to get the formula to enlarge the box. Happy Stamping! I also have submitted it to the handstampedsentiments blog challenge.
Labels:
3D Project,
gift,
Holiday,
occasions Mini Catalog,
template,
tutorial
Wednesday, September 29, 2010
Teacher gift idea

I got a free package of play date quick accents at convention and finally pulled them out to work on a variety of teacher gifts using those.
I got a metal tin at the craft store and went to work. Sticky strip is your friend here, but tombo mono works well too. I colored and stamped with forest friends owl. I added a few strips of the quick accents and used my scallop border punch as well to make the cardstock a little more exciting.
Labels:
2010-2011 Catalog,
gift,
gifts,
Scallop Punch
Saturday, September 25, 2010
Spooky Decor Elements serving ware

I don't have any Halloween dishes really, but I bought the sheet of decor elements to make my Halloween pumpkins, and then I had lots of pieces left over.
I went to walmart and bought 3 inexpensive white porcelain dishes and applied my Decor elements on them. I just tested them out at my Open House and they have done quite well at holding food and being washed and tried. I am not going to try the dishwasher, but they do well by hand! Yeah!
I could even make place cards and invitations with the coordinating stamp set!


Labels:
Decor essentials,
gift,
gifts,
Holiday,
Holiday Mini Catalog
Friday, September 24, 2010
Open house Treat Sneak Peak

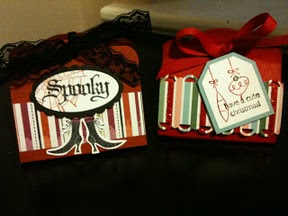
I wanted to share these two cute little Treat holders I created for my open house. These are great for any occasions, but i made halloween and christmas treat holders.
All you need is a stamp set for any occasion, and the tags die for the big shot. (cut paper to 4.5x3) It is a simple but adorable candy holder that goes together very quickly! Choose any embellishments you want. Mini glue dots work well to adhere the candy to the treat.
Monday, September 20, 2010
More frankie ideas

This time I made a treat holder with a baby Frankie which holds a Ghiridelli chocolate square.
I used my new label punch from the Holiday Mini Catalog, and my small 1/2" circle punch and used the same basic pattern from my large Frankie. This time I added a shirt for Frankie. Cut the edges off with the corner punch. Stamp the saying in the center and emboss with black embossing powder.
You need a 3x8.5" piece scored at 3", 3.25", 6.25" and 6.5". You can get 3 treat holders from one piece if paper.
Fold the holder so the short piece ends up on the inside flap. This will get punched with the word window punch and then glued down to hold the chocolate inside. A piece of ribbon tied around will keep it all together.
I stamped bats on the top half from the wicked cool set, and used the wicked
Fun ds paper.
Friday, September 10, 2010
Squash Book Class
I recent taught a squash scrapbook to my Stamp club. I kept forgetting to take picures of the project and post it. but I finally grabbed a few quick pics. I found this idea online in a few different places, but first saw one of these at meeting with my upline. I was so impressed by her's that I had to make one of my own. You need coasters, designer series paper, cardstock, and a glue stick. You will also need photos, and a good ruler!
I'm not going to give the step by step directions today, but I'll have a Holiday Squash book class coming up in November you won't want to miss! There are great instructions on splitcoaststampers though! Although I don't like using sticky strip, and I used glue stick instead. it is more forgiving and gives you a better chance at a perfect placement.
This scrapbook makes a great gift for the holidays or is a perfect mini book for the office!
I'm not going to give the step by step directions today, but I'll have a Holiday Squash book class coming up in November you won't want to miss! There are great instructions on splitcoaststampers though! Although I don't like using sticky strip, and I used glue stick instead. it is more forgiving and gives you a better chance at a perfect placement.
This scrapbook makes a great gift for the holidays or is a perfect mini book for the office!
Labels:
Designer Series Paper,
gift,
scrapbooking
Tuesday, July 13, 2010
Matchbox Drawer
This cute little project is simply made using our Big Shot matchbox XL die, 2 Sizzlits dies to make the buttons, Baja Breeze, Chocolate Chip, and some of the new In Color Pear Pizzaz cardstock, and Greenhouse Gala Designer Series paper, an adorable stamp set out of the New Idea Book and Catalog, and of course, DSP wrapped Chocolate for an extra touch! To make this adorable drawer unit for yourself, please email me to come to my next workshop. I provide the materials and fun needed for a craft night with friends.
During July, I am having special hostess only gifts and incentives. Please contact me for more information of earning free stamps and other goodies! To order a Drawer Unit Kit, please email me for pricing information.
Labels:
Big Shot,
Designer Series Paper,
Frineds Never Fade,
gift,
gifts,
In Colors
Thursday, May 27, 2010
Scrapbook Photo Purse Class
Thank you for the inspiration for this from this fantastic blog! This is a great gift idea as well as a fun new idea for carrying your photos of your family around.
It needs lots of pieces but overall is a simple concept. Two envelopes (Medium Whisper White Envelopes #107301) make the purse. I used Kraft cardstock scored in the middle to make the connecting hinge between the two envelopes. I used two pieces of DS paper with a notch cut out with a 1 1/4" circle punch to allow souvenirs inside the envelope. I placed pictures on the inside with stamped images & flowers cut out from So Saffron, Rose Red, Pumpkin Pie cardstock. I also used the Bigz die for flower which were lightly distressed and sponged. On the front, ds paper, a top note die stamped and scored made the flap. I used jumbo grommets and grosgrain ribbon as a handle. The front also had a flower and corduroy button held on with a pop up glue dot.
Supplies- Summer Mini & Idea Book & Catalog
Tropical Party Stamp set #120081
Island Floral Bigz Die #118871
Island Oasis Designer Series Paper # 117173
Various cardstocks & Inks, So Saffron, Rose Red, Old Olive, Whisper White, Pumpkin Pie, Tempting Turquoise.
VersaMark
Top Note Die #113463
Crop-o-Dile
Accessories-adhesives, sticky strip, crystal effects, glue dots, dimensionals, markers, blender pen, ribbon, corduroy button, circle punch.
I taught this at my monthly stamp club. If you would like to make this project, contact me to set up your workshop time, or to order a kit.
Labels:
gift,
scrapbooking,
Summer Mini Catalog
Friday, March 19, 2010
Gift Set-All God's Children
This uses a retired stamp set that I got 2 years ago before it retired and I just love it and will probably never sell this set. I needed a gift bag, card and tag in a hurry for a church function!
I used Kraft and Riding Hood Red Cardstock and some retired DS paper scraps. my kraft bag coordinated with my card nicely. I stamped the same stamp on my card, bag, and tag. using the same colors and stamp tied everything together and made less thinking for me. Plus I used scraps I had stored away which is always fun when you can make something out of essentially nothing.
Labels:
blender pen,
gift,
Tag Punch
Friday, October 16, 2009
Santa Big Shot Treat Holder

Yesterday I went to a meeting my upline was having, and we could bring a 3D Holiday item as a Shoebox Swap. I loved the Mummy I made a few weeks ago and I wanted to see if I could turn that same basic idea into a Santa. I googled the Coca Cola Santa for inspiration, and then went to town.
This little guy is pretty easy, but has lots of steps. I started with 4 card size pieces sheets of cardstock I ran through my Top Note Die on my Big Shot. Then I sketched out a rough hat shape and trimmed that out of Real Red, and then trimmed out the lower half of Santa's beard, and used the scrap white to make my fur trim for the hat. Apricot Appeal made a perfect face for Santa. I used my sponge Daubers and pastels to add blush to his cheecks.
I trimmed scallop oval made perfect mustaches after I cut it in half and scooped out the middle a bit. I punched 2 whisper white 1 inch circles for eyes, and 1 more for a pompom hat. I also punched 2 basic black half inch circles. I punched a 1 inch circle from real red and cut that in half for the lower lip. I used my slit punch for a nose from pretty in pink. I used my small oval to punch out eyebrows from whisper white. I took the Basic Black pastel and darkened my eye brows.
I took a Sahara Sand marker to add details for the eyebrows and mustache and beard. I also used the sponge dauber on the edges of the beard. I also used my White gel pen as a highlight on the eyes, nose and lower lip.
And no Santa would be complete without a touch of dazzling diamonds on the pompom and hat trim.
To Assemble Santa, I filled a small cello bag with soft peppermints and stapled the bag shut. then I used a pop up glue dot on each side and pinched the two together. Santa can stand up by himself now!
Feel free to duplicate Santa if you like, but if you have a blog, please link back to me! Have fun with it!
Labels:
3D Project,
Big Shot,
gift,
Pastels,
Punch Art,
Scallop Punch,
Top Note
Subscribe to:
Posts (Atom)