Showing posts with label Holiday. Show all posts

Thursday, November 21, 2013

Watercolor Video Tutorial


I love doing watercolor cards, and could not wait to try out my new stamp set, squeal, since it has been a little while since I did a tutorial, I thought a video would be best to demo watercolors.  Hope this is helpful, and you enjoy it!

Check out my latest video here.


Supplies:
You need good quality water color paper, I really like the kind Stampin Up has because it does not warp when you add water. You can use a brush, but I really like aqua painters as they help me eliminate mess and accidents!  You need a great stamp set, I used Joyful Christmas  (#131805) and of course Stazon ink.  All your classic Ink pads will work with the painter, so any color is available to you!
I also used the Season of Style DSP paper Stack, Gumball Green, Soft Suede, and Cherry Cobbler. I also used Crystal Effects for the flower centers.  Also helpful to have on hand are paper towels, and a hair dryer. -Hair dryer to dry between watercolor layers, and a paper towel to blot the paper if you accidentally put down too much color, and need to lift a tiny bit.  This also works if you go outside the lines and want to fix it if you aren't cutting it out.

Have fun and Happy Stamping!
post signature

Saturday, November 19, 2011

Craft fair

Today I did a vendor fair at a community fundraiser. I had a great time and was glad to help support a really neat individual.

I made range of items including; reindeer food, bookmarks, notepad holders, post-it pads with pens, and several other items. It was fun making everything this past week, and now I have some great experience! I also was able to use many scraps from my stash of retired paper and embellishments. I'll have to go back and link to all the great websites I used for inspiration! Thank you to all you creative folks out there with wonderful ideas!!!


Saturday, November 5, 2011

Fall themed workhop

I'm doing a workshop today with my friend Brenda, and she chose a fall theme for the Holidays with a scrapbook/home decor project.


I created this adorable page that can be used a framed art, or put in a scrapbook. I had so
Much fun with my Simply Score Tool! It makes creating these little flower embellishments so easy.


I am also showing how to make simple stocking stuffers with votive candles.


I also had to add a simple Birthday card using spice cake dsp. I adore this paper!!! I used out wonder hostess set for the birthday greeting.


Thursday, October 27, 2011

Hostess Halloween Punch Art

This week for Creative-Sketches.com we have a Holiday Card Challenge.  I know we are almost down to the wire, but it isn't Halloween yet, and I have been wanting to get this adorable Hostess set inky!
This card was created with my Owl Punch, the Large Blossom Punch, the Pennant Punch, and 2.5" Circle punch.  The Owl punch is pretty clear for use.  I stamped, colored,and paper pierced this adorable trick-or-treating owl.  I wanted to use my punches to create a Halloween scene, but follow our fun sketches this week.  I took some liberties, but kept some elements  like the large top curve became my moon.  The ribbon at the top of the sketch dropped down and became my fence. To give my little scene some depth and dimension, I sponged edges, and created wood lines for my fences. 

Punch Art Tricks-
Use the inside of the Pennant Punch to create perfect angles for the tips of banners and the tops of fence posts.  Thread in your strip so that only the corner you want punched is inside the punch itself.  It can be tricky to maneuver so a post-it makes a great handle!

Think Outside the box- The Blossom punch makes a great cloud when you cut it apart and reassemble pieces of the blossom in layers as cloud sections.


So Happy Halloween, and be safe when you are Trick or Treating!  Swing by our challenge blog to submit your card using our sketch!

Monday, October 24, 2011

No sew pin cushion and Sewn version

I found this awesome pair on this blog, and had to CASE it! Thank you for the inspiration!


Sewn version first-
I adore my Big Shot for fabric projects. I used my square scallop die to cut out 8 squares from my Spice Cake fabric.
See together with right side out so you have the scalloped edge. Repeat 4 times and then sew the top and bottom block. Now you have a front with 4 squares and a back. Press with an iron. Go around the edges leaving a hole out for stuffing. Stitch the open edge closed.

Take two buttons and a large needle. Go from side to side pulling the buttons in to create a divet. Snip thread all over and you are done!


No sew version-
Cut a 8" square of fabric and grab a handful of fluff. I used a fancy feast cat food can, but a different small container would work for this project as well. Think small flower pot or metal can.

I cut a 1.25" x 12 strip and wrapped my can. I heated hot glue, and ran a bead of glue around the top of the can. Wrap the fabric and fluff in a ball, and pit inside the cat food can without burning yourself! Tie a bow or embellishment and you are done!

Friday, October 21, 2011

Advent Calendar project in the works

I have been searching for the perfect advent calendar for years ever since we had children. This year, I will have one that I will be able to use for years to come!  Stampin' Up! thoughtfully created a great new advent stamp set that I am going to use to make an incredible calendar for this year.  I will also be using the new coordinating Big Shot die and  1" Square punch.  I debated doing it on paper or in a frame like the awesome one I saw at Stampin Up! Convention, but I think I like this new idea better.  I will be using a 25 small boxes around a frame so I can put little treasures inside for my children to take out each day!

I will stamp, punch and color, and then decoupage all the boxes, and create a wonderful punch art for inside the advent frame!  Winter Wonderland, snowmen, and glitter here I come.  No finished pictures yet since I finally found a supplier online for the box frame, and they have been shipped out Wednesday. Normally I try and use only Stampin' Up Products, but I needed something that we didn't have-gasp!. 

Check back next week to see what I have created!  This is a great holiday gift which I will be selling only 2 of at a local benefit in November.  If you want to order the materials or a complete kit, please contact me!

Friday, July 22, 2011

Iris Folding-ornament punch

This week our challenge was to do a Card using Iris Folding. I have never done this before, and it was so much fun to learn how to do it, and then make a card myself.


To make an Iris Folded card, you need to have this strips of folded scrapbook paper. Then you layer them around in a pattern based on your template or shape you want to use.  If you google it, you can come up with tones of free templates, and some really interesting projects.  Mine is a great beginners project though!


I had my ornament punch and wanted to do my folds using that punch so I created my own template. I basically took my punch traced it out, then doodled around with my ruler until it looked good to me. I have a picture of my template. I'll clean it up and add it as a new file for downloading.

Then I used my punch piece and laid it down and taped it with scotch tape so I could check my work. Layer up your strips, trim the excess and go around until you get to the center shape. I popped my ornament with dime Sui dale and finished my card with glitter, and a greeting from Greetings Galore. Simple but fun!

Give it a try, and post your project at Creative-Sketches.com.


Tuesday, July 19, 2011

Fast and Easy Christmas Card Kit Available

I will be hosting a Christmas in July class this month (see my calendar page to register) but I also wanted to offer a Fast and Easy Christmas card bundle. I have put together a kit that can let you make 20 Christmas cards in just a few minutes.

Your kit includes the Merry and Type clear stamp set, the Quick Accents Letters to Santa Embellishment kit, and a package of our whisper white 5x3.5" notecards and envelopes.


You will only need an ink pad to stamp. ( I recommend Old Olive, or Real Red) The accents are already sticky and assemble easily. I will trim the strips to fit the card fronts. The kit is $38.95. Upgrade the kit with out new 1/2" scallop dotted old olive grosgrain ribbon or designer bright buttons (you'll use only real red and old olive) for an extra $8.95.

To Order the Kit, please email me at hrpilz"at"gmail.com and let me know how many kits you need, and whether or not you would like the ribbon, or the button Add-Ons. If you are local, I'll deliver the kit, if not, I will ship the kit to you after I trim the strips.

Thursday, June 23, 2011

Holiday Sketch My Digital Studio Father's Day


So this is incredible late, but I wanted to post my Father's Day card I made for my church group.  It is also Holiday Week for The Creative-Sketches.com blog challenge.  We are doing Holidays this week.

I normally don't do MDS cards for the site challenge, but I really loved this one.  My plan was to print it and turn it into a hybrid card.  I should have planned ahead and had it printed out.  My laser printer does not do a great job color matching with SU colors, which is truly disappointing.

Please visit the site to add your sketch to the site list.  Can't wait to see what you come up with!

Thursday, March 24, 2011

Creative Sketches Week 4 Mother's Day


This week, the Creative Sketches Design Team tries to combine a Sketch and a Holiday card.  Knowing that Mother's Day is really not all that far away, I started thinking of what my mom might like to get in the mail. My Mom does not love pastel colors, which typically are used in the spring and for Mother's Day so that makes it challenging to make a card for her.   She loves rich jewel tones though. I was thrilled that I was able to combine the Color Challenge from Just Add Ink (Rich Razzleberry, Old Olive, Crumb Cake, and Whisper White) with the Creative-Sketches.com Sketch Challenge to come up with a card that I think my mom will love!


This adorable card uses one of my favorite Holiday stamps sets, All Holidays.  It covers just about every major holiday in the year.  So versatile!  I pair with my trusty Big Shot Top Note Die, and Vintage Wallpaper Embossing folder, my new Boho Blossom punch, the two Step Bird Punch, and some wonderful Designer series paper from the Bold color pack.

To add a little sparkle on this card, I used my favorite Old Olive 5/8" grosgrain ribbon, a Rich Razzleberry brad, and some wonderful pearls. I love the different sizes with the pearsl too!

So, go on over to Creative-Sketches.com and post your holiday card! Can't wait to see what you make!

Thursday, March 10, 2011

Messages For Mom - Contest Submission


So I finally got up the nerve or punctuality to submit an entry to Stampin Up!'s monthly challenges.  The theme for my entry was Mother's (or Fathers) Day.  I am writing this post in January, and the contest ends in February, so I will have to do an update.  At this point I have no idea if I have a chance or not, but it is my goal to win at least once this year, and to do that, I will have to start submitting every month.

This card is not one I would ever want to make in bulk, but I love the results.  I stamped the flower in this set on watercolor paper, water colored it all in, and then cut all the little flowers out. Then I added crystal effects to the little flowers to add some sparkle and dimension to each one.  I am really loving tearing paper, so that was another fun way to perk up the color palette of Rose Red, Crumb Cake, Whisper White, Pear Pizzaz, and Blushing Bride. those colors are part of the color palette for the Springtime Vintage Designer Series Paper which I love!

Thursday, February 17, 2011

Valentines MDS Style

I have two school age girls, and both girls are in Girl Scouts, which meant we were looking at over 70 valentines that needed to be made.  Shockingly enough I left it until the last minute. My Digital Studio was able to help me out!  I created a 6x6 card, then shrunk everything down and placed 12 on a page. I mounted those 2.625" squares on a 3x3 piece of cardstock, which got adhered to candy and a pencil.  The concept was lollipop, but it became more of a flag:)  I'll choose different candy next time.  I also used some leftover candy cane fabric to make an adorable little flower from my Island floral Die.  Not only did it make a great accessory for the bag, it is actually a hair clip for her teacher.  My daughter said she wore it the rest of the day!  Yeah!


Wednesday, January 26, 2011

Creative Sketches Week 4 Holidays


This week at Creative-Sketches.com we are creating a card for  a Holiday. Since Spring is coming our way, and I made about 5 valentines day cards this week, I was in the mood for something else and went with a Mother's Day Card.

I really love the stamp set Just Believe, but so far I have not tried using it on moist watercolor paper. I colored in the flowers and inked up the grass then pressed firmly on my damp but not wet paper.  I also tore the edges for the deckle edge.  I also just got some wonderful new ribbon, Blushing Bridge Stitched Poly Ribbon.  It is heavy weight stuff, but makes a great bow!  My final step was to turn this into a Mother's day card.  The modern label punch would have worked, but instead I used a smaller approach with the Word Window punch, then embellished it with another stamped flower. This time I did not use moist watercolor paper, but colored it and cut it out. I added a Pearl in the center to give it a little more polish.  Now to store it somewhere safe until it is time to send it to my Mom!  Pop over to Creative-Sketches.com and post your holiday card.

So when I started the card, I just chose the colors myself, or so I thought.  After I was popping around on a few other sites, I remembered seeing the Inkspirations Challenge Color Challenge this week.  So my first version was all but perfect except I forgot the Early Espresso on the card.  So I stamped it again, and here we are!...I just found another fun challenge site, and had to submit this there are well.  They wanted a card with a bow :)  Thank you Pals Paper Arts!  I love bows!  I also submitted it to CraftyCardmakers Challenge site with their Floral Challenge.

Always Valentine


I took an existing layout from a previous post, and converted it to work with a different stamp set.  I really like swapping out layouts that I like with different stamp sets. When something works, it is easier than dreaming up a whole new plan. 

I like this card because it could work as a Valentine, but would also work nicely as a simple card of affection at any time of year. 

Saturday, January 22, 2011

3x3 Pizza Box - Free Template


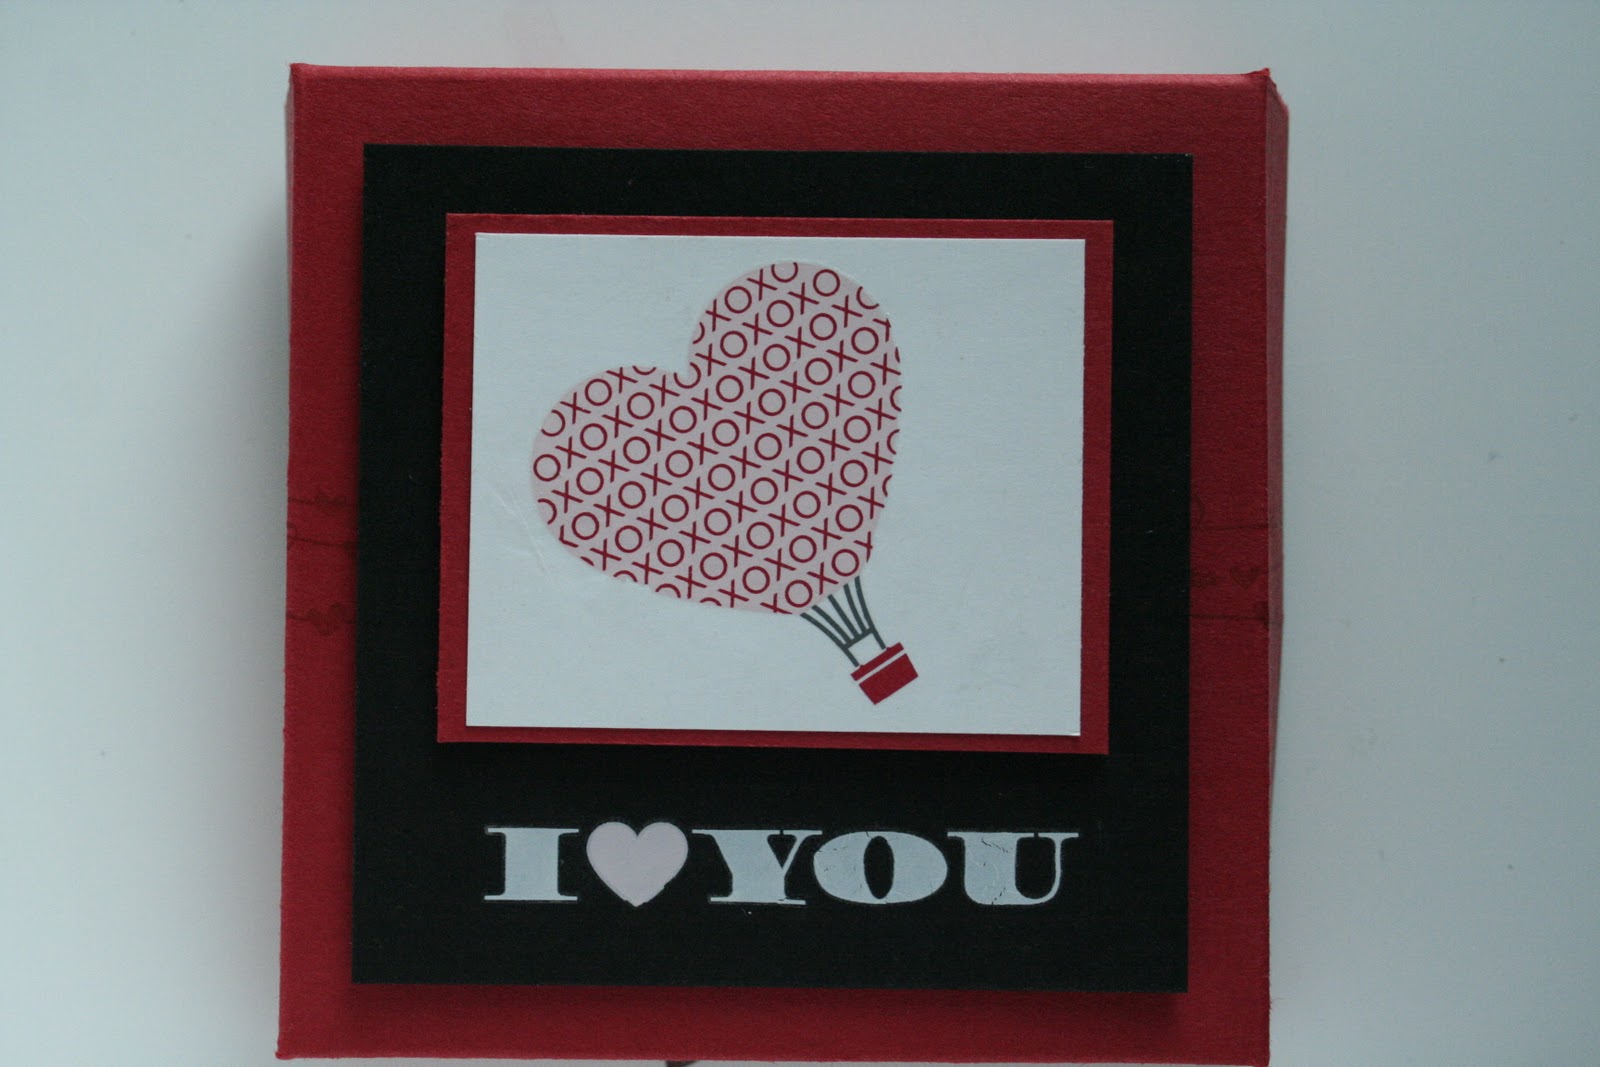
This adorable little box is made from a half sheet of cardstock, scored, folded, decorated, assembled, then finally glued! I used Valentine defined again from the Occasion Mini Catalog.  This little box will be part of my Love Sweet Love Class, which will be available as an online class/kit for purchase. I will send you all the supplies and instructions to make the 2 cards and the pizza box for $8 (Includes shipping).  I'll have a list of additional supplies which can be purchased though my website.  (stamps et, blocks, ink, etc)

I do love my heart punches, and had to bring back the coordinating stamp from my Love you Much set.  My next project is going to dust of the entire set and bring back my favorite little mouse, but in the mean time, it fits perfectly in my punch! 

I still say when in doubt, labels make the best Nugget wrappers.  Designer Series paper is always adorable, but in a hurry, stamp and wrap!  I made a simple divider to keep the chocolate in place, but when you are done, the box can be reused to hold your 3x3 note cards.

I have included the template to make this little guy, but you can also watch an awesome video by fellow Demonstrator Mike Funke, and he also has a handy mathematical formula for figuring out how to make the box at any size. (On a side note, I met him last year at Convention -.  Really great guy, and always fun to meet a guy demonstrator!)

I made a second box last night using a set of Free Rub Ons that Stampin Up gave all the demonstrators. With that box I included a set of 3 note cards.
I love the Red tree with the Crystal Effect Hearts.  I think it really makes the card pop!

If you would like to order a box & set of cards for yourself, it is also $8 plus shipping.

This template has instruction for a 3x3 box.  Check out Mike's blog to get the formula to enlarge the box.  Happy Stamping! I also have submitted it to the handstampedsentiments blog challenge.

Valentine Defined!

I really love this set, but I had a harder time using the tree stamp.  I was browsing around on StampinConnection.com, which is a really awesome online community for Stampin Up! demonstrators, and saw some wonderful cards. With that inspiration, I made this card.  I stamped the background and ran it into my Big Shot embossing folder.  I love how I was able to create a great looking background without buying more paper for this card, not that I don't love Designer Paper, but sometimes is isn't in the budget!
I inked the tree with my lighter Pretty in Pink ink pad, and colored with my Chocolate Chip marker on the trunk. I could have hit a few of the hearts with Melon Mambo or Rose Red, but I was in a hurry!
I repeated the process with my Love stamp, only this time it was all done in markers since the area was quite small. I stamped and punch with my Small and Large Oval punches. I stamped another heart, dazzled it up and popped it with Dimensionals.  To finish off the card, I added a fine line of two way glue and sprinkled on Dazzling Diamonds.  I think next time I will use Crystal Effects for the Glue.  It will dry slower, but I would have made less mess using that glue I think. 

Saturday, January 15, 2011

Valentine Defined


This is my second card using this stamp set, Valentine Defined.  I really love these little flamingos!  I saw a card made by Mary Fish on her site Stampin Pretty, and wanted to try the ribbon technique on her card.  I ran my ribbon through my sewing machine on the loosest stitch, and then pulled gently on one string to gather up the ribbon.  Just for fun, I also ran around the edge of my card with the sewing machine.

Supplies:
Valentine Defined #123057(clear)
Small Oval Punch
Cherry Cobbler Ink
Whisper White, Basic Black, and Cherry Cobbler cardstocks
Whisper White Sating Ribbon

(adhesive, paper snips, and a sewing machine)

Friday, January 14, 2011

Valentine Defined

I just love this new set in the Stampin Up! Occasions Mini Catalog.  To create this fun Valentines Card, you need Valentine Defined. I am a sucker for our definitions stamps sets like Define Your Life, so when I saw this one, I had to have it.  I used it once today creating a card for Stamp Club, but this card is for my Love Sweet Love Class next week.  

Creating the card was straight forward.  I did a zigzag of the hearts on a string to create my background, stamped my other pieces and assembled.  I also stamped my heart punches to give them a little texture. Fun and easy!

Supplies Used:
Punches-1 1/4, 1 3/8 circle, Heart to Heart, and Scallop Edge
Real Red Cardstock, Whisper White Cardstock, Cherry Cobbler Cardstock, Basic Black Cardstock
Basic Black 1/8" Taffeta ribbon
Basic Black and Real Red Classic Ink

Monday, January 3, 2011

Filled With Love - Valentine's Day Bundle


Valentine's Day is the second biggest holiday for sending cards, and during Stampin' Up!'s Filled with Love promotion, you can get an exclusive package of Designer Series Paper perfect for creating cards for family, friends, classmates, and more!

From December 17, 2010 through January 24, 2011, get a FREE package of Bitty Buttons--a $4.95 value--when you purchase an exclusive Filled with Love Bundle. This bundle contains the Filled with Love Set (on page 43 of the 2010 Holiday Mini Catalog) and Love Patterns Designer Series Paper Pack.

Download the flyer for complete details, item numbers, prices, and photos!  Or pop straight over to my online store and start shopping! Click on the link, then click shop now under products. Remember to check out the Clearance Rack for some incredible deals!!

Thursday, December 30, 2010

Creative Sketches Week 5 Project


am so excited!  I got accepted on a design team for Creative Sketches.  So today I am posting my first project as a member of a Design team.  How fun!

Our project this week was anything goes, so I made a simple diaper fold pouch for some Christmas treats. To make a Diaper Fold Pouch you need a square piece of paper, folded in half like a triangle, then the joined sides fold in to touch the opposite edge.  Fold the top flap over and hold with a piece of adhesive then decorate.  You can size this up or down as needed.  My piece here was 7" and fits 2 Chocolate squares. A 6" piece will hold 1 treat very nicely.

I love being able to coordinate paper, stamps, and ink!  Thank you Stampin Up!  I love my A Cute Christmas stamp Set with Candy Cane DSP.  I am going to miss these guys! 

Pop over to the blog and post your project and link!
Related Posts with Thumbnails